For those of you looking to add a little something extra to your Pentaho Report Designer reports, here are some steps to allow FusionCharts to be inserted directly into the report. Of course, this is very format specific, and will only work with HTML.
Download, Setup, and Test on Pentaho Server
Begin by going to this link:
http://www.fusioncharts.com/free/download/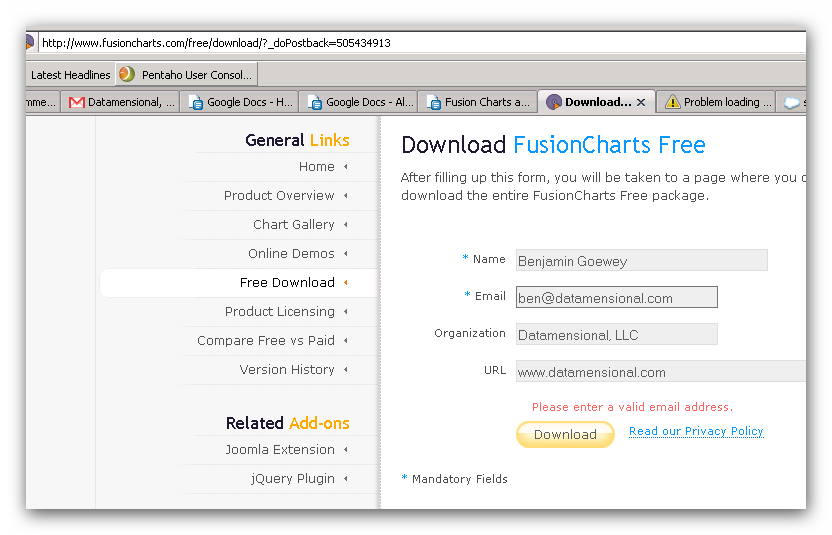
Find the FusionChartsFree.zip archive file. Extract to your Pentaho install directory (ours was called pentahoSandbox):
C:/Program Files/pentahoSandbox/server/biserveree/tomcat/webapps/pentaho/FusionChartsFree/
http://localhost:8080/pentaho/FusionChartsFree
This puts it in the web directory so other Pentaho solutions can access it and it’s also protected by the same security under the Tomcat server.
Now you should test that you can run a Fusion Chart from this directory. Go to this web address to test a Fusion Chart on Pentaho’s BI Server:
http://localhost:8080/pentaho/FusionChartsFree/Code/MyFirstChart/ChartJS.html
Your result should look like this: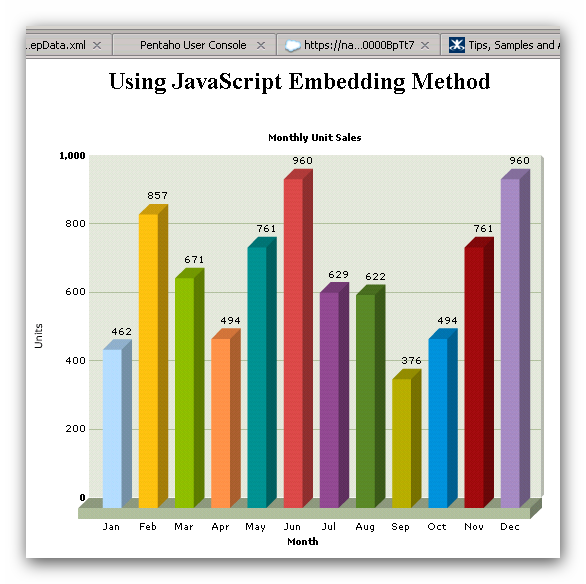
Pentaho Data Integration (PDI) Transformation to create Fusion Data source
Fusion charts as well as most Adobe Flash based charts including Flex use XML as their data source. The transformation needed allows you to create the properly formed XML document dynamically from any SQL data source. We will use the sample database that ships with Pentaho. Ultimately, we will link this transformation as a data source to PDI and it will dynamically create an XML file from the SQL input changes coming from PRD.
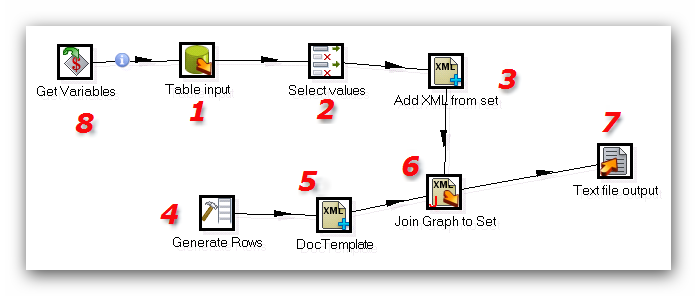
- Table input: Create a query like the below when starting to create your transformation. This will eventually be turned into an XML file that Fusion charts can read. Use this SQL to start without the Where clause so you return results. Add the where clause later with the question mark in a later step.
- Select values: This step prepares some of the data as place holders for the XML document and changes some of the Uppercase to lowercase.
- Add XML from set: This creates a “set” XML tag and makes all the other columns to attributes of this tag.
- Generate Rows: This generates the graph XML node as well as all of the attributes of that node. These are static now, but you could potentially build this out and parameterize it so that the end-user could change various aspects of the chart.
- Doc Template: This is the same step as step 3. This creates the basis for all the set nodes to attach to. Right now it’s simply a one line tag of XML. Fusion documents only have one graph tag anyway, and it’s always the highest level tag.
- Join Graph to Set: This step ultimately joins the two nodes together. The set node is the child to the graph node. Each set represents a value on the graph. They are joined by the graph. This currently is what a typical XML document would be.
- Text file output: This simply takes the XML and stores it as a file. Another suggestion is to stream the XML file instead. You may want to experiment with that. I called my XML file something a little different so I could distinguish it from the other default data files. I put it in the same directory for simplicity sake:
- C:\Program Files\pentaho\server\biserver-ee\tomcat\webapps\pentaho\FusionChartsFree\Code\MyFirstChart\AddXMLStepData
- Note to make the file extension .xml.
- Run the transformation to ensure you get data and then launch the ChartJS.html created previously to ensure that the Fusion chart reads the data.
- Get Variables: This step gets the variables that are set in the settings of the transformation. This is how you would use them:
- Go to Edit -> Settings . . . -> Parameters (tab)
- Put in ParmProduct with a default value of ‘default’.
- Now add the Get Variables step and connect it to the input step.
- Name the field “Product” and then the parameter “ProductParm” and make the type string.
- Edit the table the input Step. Add this line underneath the “From” Statement in the Table input step: WHERE “PRODUCTS”.”PRODUCTCODE” = ?
- Click “replace variables in script”
- Select in the drop down “Get variables from Script” and select the “Get Variables” step.
- Test by running again. You should get no errors, but you should have an empty data set since no product codes equal ‘default’
Create Pentaho Report Designer (PRD) Document and integrate with Fusion Charts.
- Open PRD
- Create new JDBC query. This query will be used to populate values in a “Product” filter under Data Sets on the right hand side. Set the data source to the SampleData and use this as your query. Use this SQL:
SELECT
“CUSTOMER_W_TER”.”COUNTRY”,
“ORDERFACT”.”TOTALPRICE”,
“PRODUCTS”.”PRODUCTCODE”
FROM
“PRODUCTS” INNER JOIN “ORDERFACT” ON “PRODUCTS”.”PRODUCTCODE” = “ORDERFACT”.”PRODUCTCODE”
INNER JOIN “CUSTOMER_W_TER” ON “ORDERFACT”.”CUSTOMERNUMBER” = “CUSTOMER_W_TER”.”CUSTOMERNUMBER”
- Go to Parameters in the data pane and right click and then select add parameter.
- Call your new parameter ParmProduct and fill it out like so and click OK.
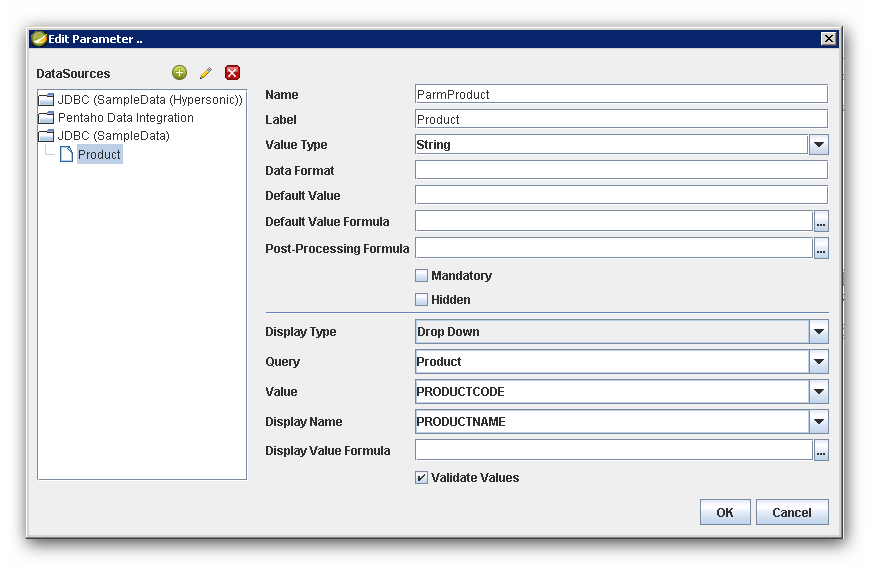
- Add a new data source by right clicking on the Data sets, and releasing on Pentaho Data Integration.
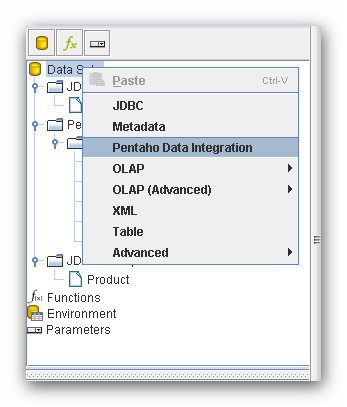
- Select the PDI transformation you had saved previously to create your XML.
- Select the table input as your data stream for your data.
- Now click “Edit Parameters.”
- Match the parameters on the far left side from PRD to PDI on the right like in the picture below:

- Click OK. On the right side, select the PDI “query” you just created and right click and select “Select Query.” This ensures your main document is using that.
- Drag COUNTRY and CL to the details band.
- It’s recommended you unhide the “No Data” band so you can better understand if a problem comes up that it’s due to you selecting no data. Drag a label there and write “No Data”.
- Change the page setup to Landscape to better accommodate the size of the chart.
- Drag the Report Header band so the height is at least 400 pixels to allow space for the chart.
- Drag a label into the Report Header and expand it to the same size as the Report Header.
- Make sure you are clicked on your text-field or label you dragged to the canvas.
- Click on attributes.
- Go to “append-body” under the HTML header. Click on the ellipse for value and put this script or similar as an absolute directory within your localhost or remote if you want to access this from another machine. I recommend doing it this way because it gets confusing when you preview from PRD or the BI Server because it references different directories and thus relative directories might change. Your code will look similar to the one from the Fusion charts. If you want to include JavaScript libraries and make them accessible by everyone, I recommend putting your code in the master-report append-body attribute.
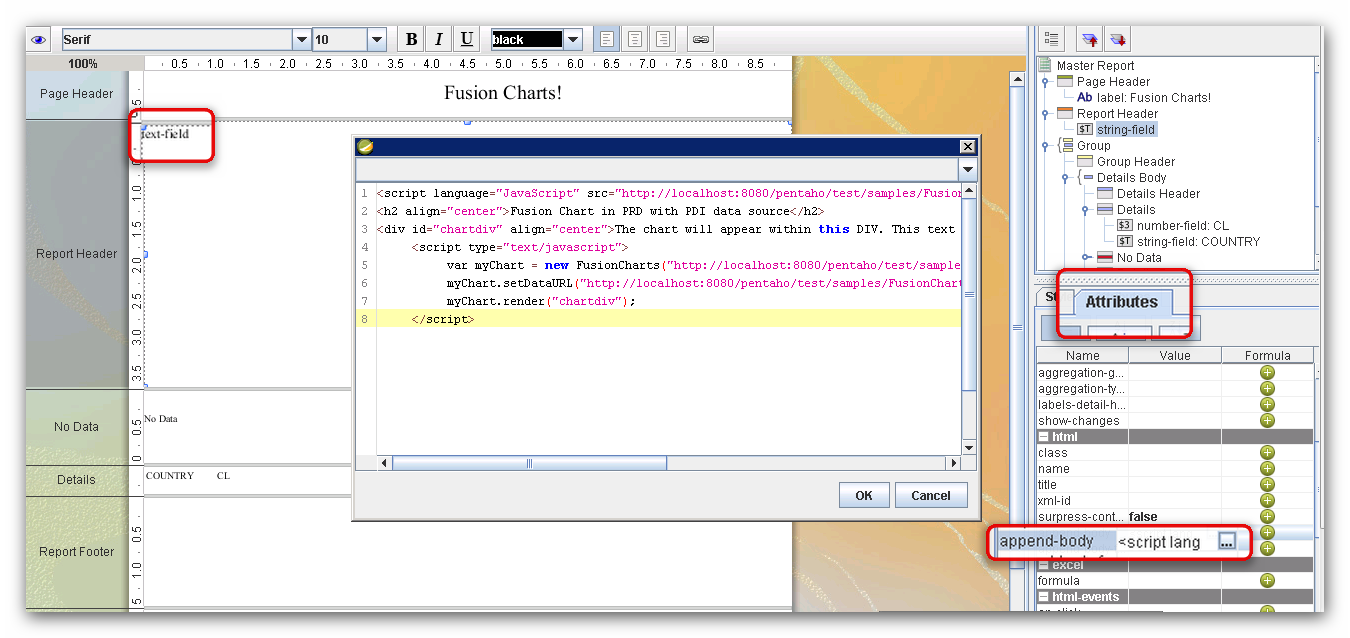 <script language=”JavaScript” src=”http://localhost:8080/pentaho/FusionChartsFree/Code/FusionCharts/FusionCharts.js”></script></head><h2 align=”center”>Fusion Chart in PRD with PDI data source</h2><div id=”chartdiv” align=”center”>The chart will appear within this DIV. This text will be replaced by the chart.</div><script type=”text/javascript”>
var myChart = new FusionCharts(“http://localhost:8080/pentaho/FusionChartsFree/Code/FusionCharts/FCF_Column3D.swf”, “myChartId”, “550”, “450”);
myChart.setDataURL(“http://localhost:8080/pentaho/FusionChartsFree/Code/MyFirstChart/AddXMLStepData.xml”);
myChart.render(“chartdiv”);
</script>
- Add a Page Header if you wish.
- Click OK.
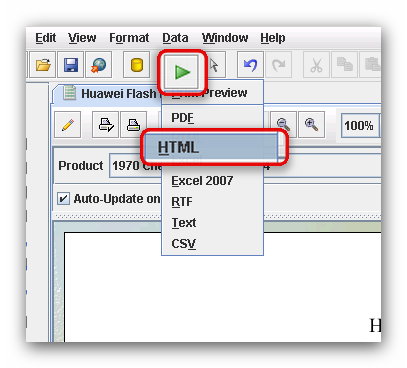
- Before previewing to see the Fusion chart, remember you can only use the HTML preview. It will not show up any other way. To do this, click on the big green play button at the top and then select HTML.
- Your finished product should look like this and you should be able to dynamically change it on the fly.
You can also preview after publishing to the BI Server and you should get the same result and be able to dynamically change the chart by selecting another value in the drop down list.
Recommendations & Notes
- Fusion charts will not work cross platform. Relative paths are confusing when troubleshooting in PRD. So that’s why I put the absolute address. However I have noticed that when creating a new application folder the Fusion charts will not reference the application folder “pentaho.” You should decide which folder you want to demo the fusion charts in and update the path to those Fusion charts accordingly and make sure the contents are there.
- Fusion charts are not supported officially by Pentaho Support though their implementation is common in CDF and on the BI Server.
- CDF will soon have a built-in component for Fusion without needing an .xaction interface.
- You can add more line detail by creating a sub report with another query that does not aggregate and link it to the primary parameters on the master report.
- You can drag any other reporting elements to the canvas.
- You can create new Flash charts on the fly by doing the following (This is definitely advanced, but it can work!):
- Create a new transformation in PDI. Use the Get File Names step.
- Use it to read the names of the charts in the directory structure for the Fusion Charts on the Server.
- Have it flow to a dummy step. Save it.
- Create a new data source in PRD and point it to the dummy step you just created.
- Create a new Parameter called “ChartType.”
- Use the new PDI data source as the source query for your ChartType.
- Go to Append-query of the text-field that contains our JavaScript.
- Go to formula. The tricky part here is you’re going to use the formula functions to actually write the JavaScript string in the value column.
- Use the message notation or other scripting option to basically swap out the chart loading function. In the report example, you’d want to swap out this part: FCF_Column3D.swf with the chart type parameter.
- Thus, your code should look something like this: “JavaScript String Value Beginning” + ${ChartType} + “JavaScript String Value End”
- You can create additional inputs into PDI from PRD for the overall graph settings. Currently, they are static as “Generate Rows” steps for the simplicity of this demo. Thus, the user could have more control over how their chart looked.


Hello Benjamin,
This is Rishi from the FusionCharts team.
I’m glad that you’ve written this tutorial about integrating FusionCharts Free with Pentaho. I appreciate the Recommendations & Notes that you provided in the later part of your tutorial.
I’d like to let you know that the latest version – FusionCharts XT provides a lot of features that are absent from FusionCharts Free.
One can make use of the unlimited and unrestricted trial version of FusionCharts XT. If one is OK with the watermark present in this trial version, then it is a much better option.
Hi Rishi,
Thanks for your comments and the FusionCharts team for retweeting my posts. I think your team creates a solid product, and is worth the money if users are looking for more features. We also appreciate that there is an OpenSource version of your product.
Keep on visualizing that Data!
Ben
Hi, I’ve made my homework!
In the link you will find the report with the report customization for diferent kind of graphics.
http://bit.ly/yIzqx6
Tanks a lot!!!!
Muchisimas gracias….
Excelente manual….
Hi Ben
Thanks for the article.
I could not get the html output in the PRD 3.9.1.
I did not use PDI but I created a static XML file manually and used it as input to the chart.
When I preview the chart as html in PRD, I get a blank page.
But if I save the html file in the browser and change the path to relative path and open the html file, then I was able to see the chart.
(I placed the .js, .swf and the .xml file in the same folder as the html file and removed all paths from the filename)
I made sure that the server was running when I was using the absolute path.
Any ideas on how to use FusionCharts in PRD especially as HTML5 output is really appreciated.
The link to the .ktr file is dead (See the code in the .ktr file)
Thanks in advance
Vadi